How to Personalize a Pencil Case
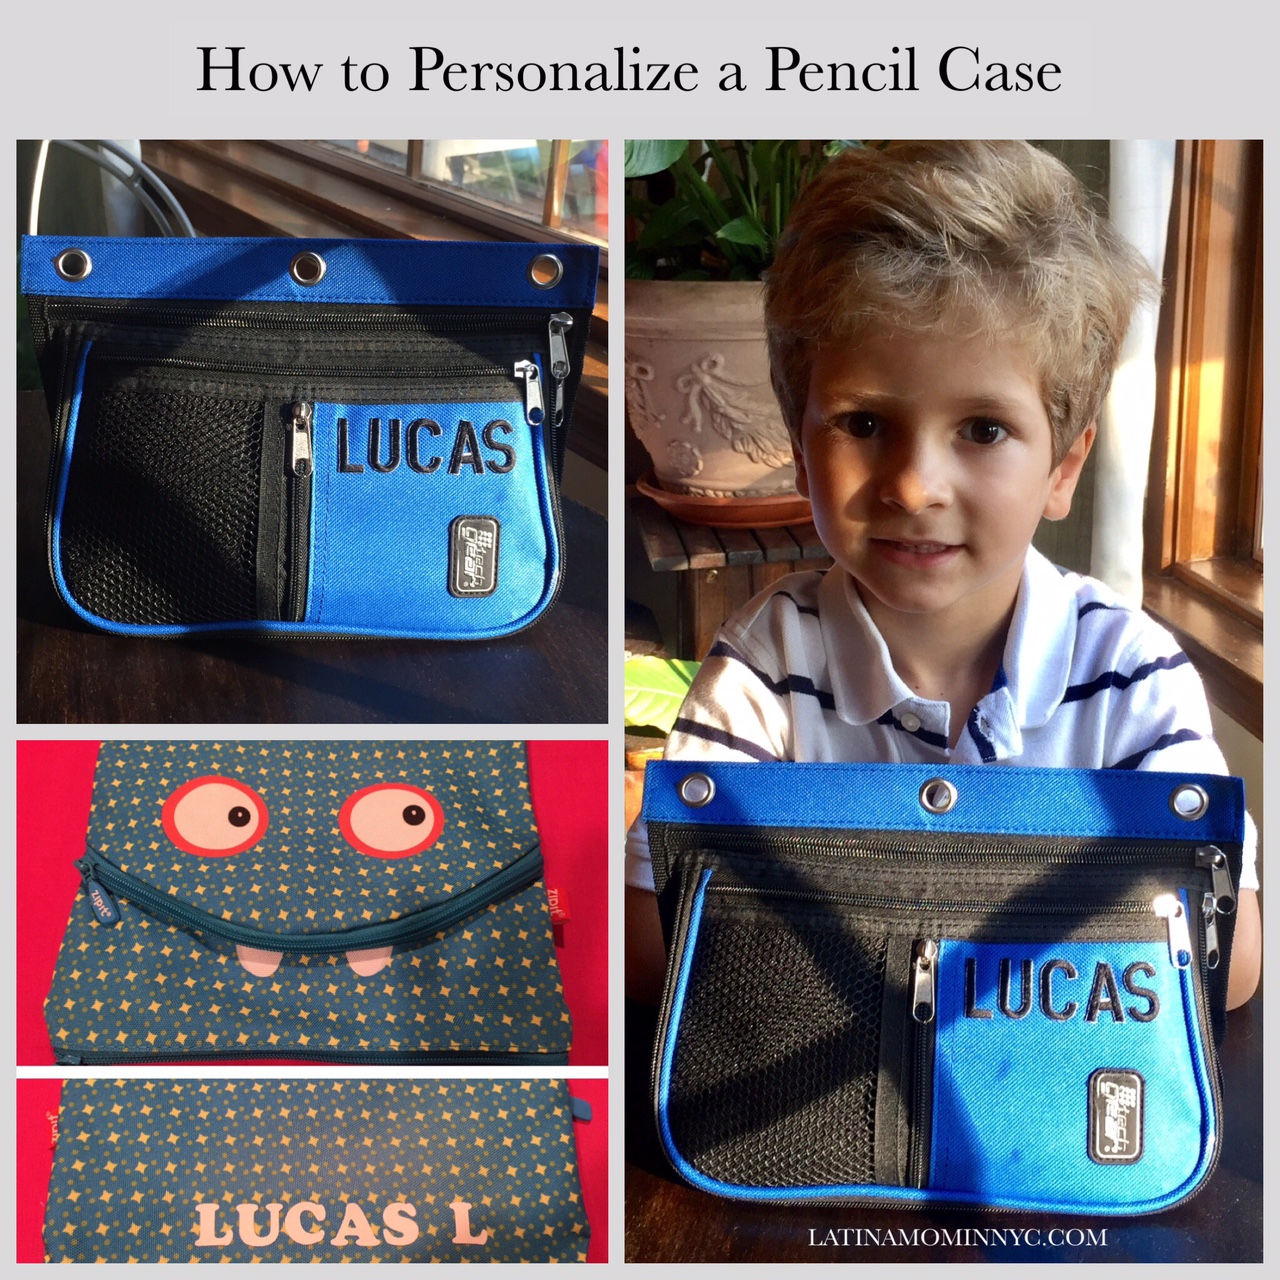
The first day of school is almost here – only 4 days left. Last night, I finished my last back to school project. I added Lucas’ name to his pencil case. It’s easy to personalize a pencil case with iron-on letters.

For this project, you will need:
- A soft pencil case
- Iron-on letters
- An iron and ironing board
- A pressing cloth
Select a pencil case: You need to make sure the pencil case fabric can be ironed. Test a corner of the pencil case before you start.

Select your iron-on letters: Iron-on letters come in different fonts, sizes and colors. They also come in different fabrics – embroidered, flocked, glittered, etc. For the blue pencil case, I used 1″ embroidered iron-on letters. For the monster pencil case, I used 1″ flocked iron-on letters. Select a fabric that matches your child’s style.

How to apply the iron-on letters: Start by reading the instructions on the packaging. It will tell you the appropriate heat setting based on the letter type selected. Remember to test the pencil case fabric to make sure you can iron on it.
- Remove the letters from the sheet.
- Place the letters sticky side down on the pencil case.
- Once the letters are lined up and you’re happy with the placement, cover with the pressing cloth.
- Iron over the pressing cloth in small sections to activate the adhesive on the back of each letter. Iron the letters from the top and the back side, especially if your fabric is layered or thick, to ensure all of the glue is melting into the fabric.
- Once you’ve ironed the letters for the suggested amount of time on the packaging, slowly remove the pressing cloth
- Let the fabric cool
Iron-on letters are an easy and inexpensive way of personalizing school supplies. If you try this project, please share and tag your pictures #latinamominnyc
Have a great Labor Day weekend and first day of school.
Share your comments about this post. We want to hear from you.