Applying Badges with Cricut EasyPress
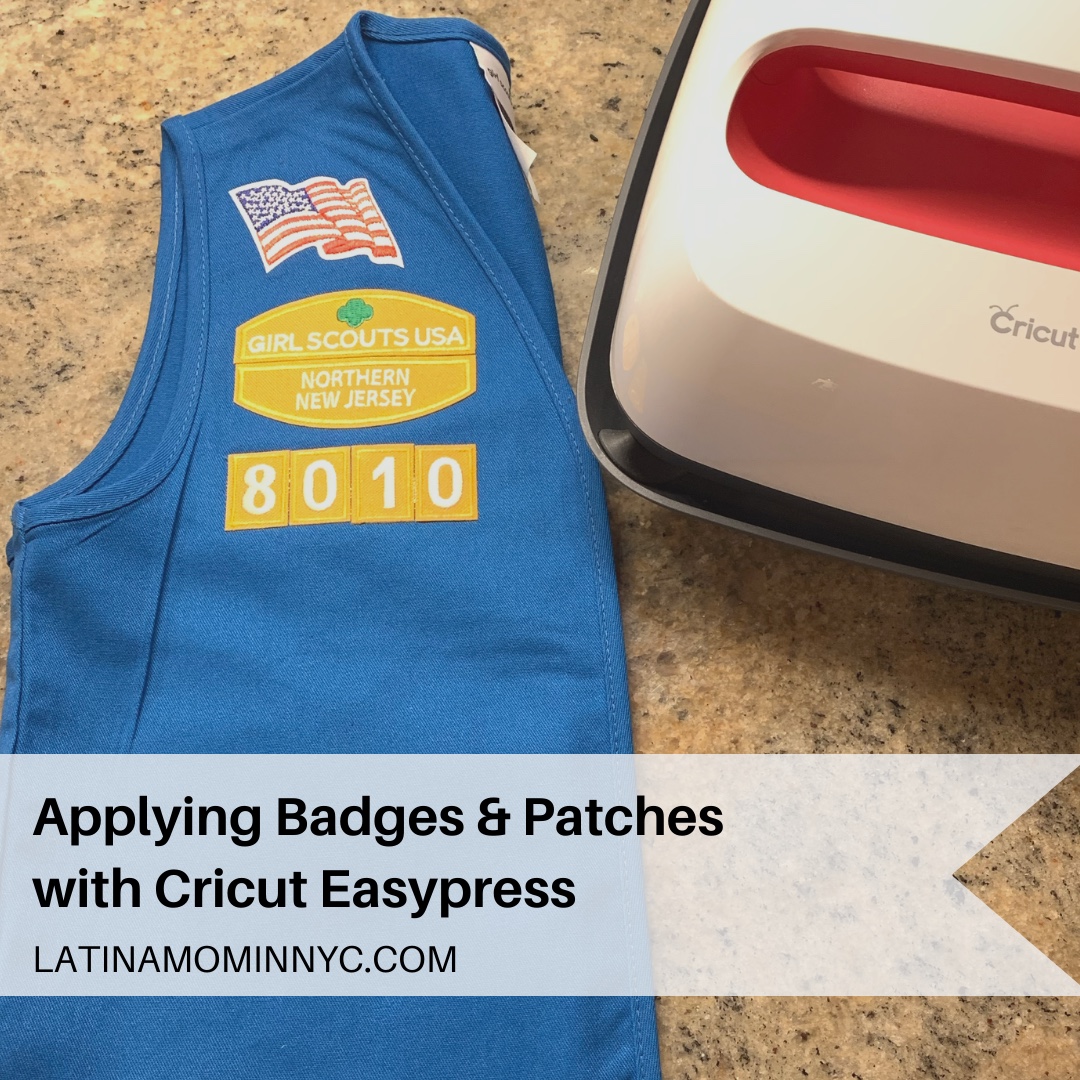
I’m a new Girl Scout Daisy troop leader. I wasn’t a Girl Scout growing up so I’ve been learning about Girl Scout traditions with my kindergarten Daisies. One of the first tasks I tackled as a troop leader was ordering our Daisy uniforms. When you purchase a new uniform, you need to apply the insignia to the front of the tunic, vest or sash, including the American flag, council ID set, and troop numerals. Here’s a tutorial for applying badges and patches using a Cricut EasyPress.
What’s the Difference Between a Girl Scout Badge and Patch?
Girl Scout badges are earned for learning a new skill, and placed on the front of the uniform. For example, first year Daisies learn about the Girl Scout Law and earn ten daisy petals. Explore the Girl Scout badges by grade level.
Girl Scout patches are given for participating in an activity or event, and placed on the back of the uniform. My Daisies receive a Happy Birthday patch during their birthday month.

Temperature Setting and Time for Girl Scout Badges and Patches
- First, preheat your Cricut EasyPress to 320 degrees Fahrenheit. Once the EasyPress has reached the desired temperature, press the uniform to remove any wrinkles and moisture, and improve adhesion of the badges and patches
- Place your badges on the uniform based on the Girl Scout uniform guide
- Then, press the front of the badge for 30 seconds; apply light pressure
- Turn your uniform inside out and press the back of the badge for another 30 seconds; apply light pressure
- Allow the uniform to cool on a flat surface
How to Convert a Sew On Patch into an Iron On Patch
Badges are iron ons. Patches can be either sew on or iron on. Convert a sew on patch into an iron on by applying Heat N Bond Ultrahold adhesive to the back of the patch.
To apply the adhesive to the patch:
- Preheat your Cricut EasyPress to 320 degrees Fahrenheit
- Place the patch on the adhesive sheet and trace its shape onto the sheet using a pencil
- Cut out the patch shape
- Place the adhesive sheet on the back side of the patch with the paper side facing up
- Press the patch and sheet together for 3 seconds
- Allow the patch to cool
- Remove the paper backing from the back of the patch
- Press the front of the patch for 30 seconds; apply light pressure
- Turn your uniform inside out and press the back of the patch for another 30 seconds; apply light pressure
- Allow the uniform to cool on a flat surface
Tips:
- Use an EasyPress Mat. You’re able to press your projects on any hard flat surface. Purchase a mat larger than your EasyPress (i.e. I use a 20″ x 16″ mat with my 9″ x 9″ EasyPress).
- Iron a center seam on the back of your vest and place the fun patches to the left and right of the seam. You’ll be able to easily fold your vest without creasing the patches.

Show your Girl Scout Pride with an Official Adult Vest
Troop leaders and volunteers can show their Girl Scout pride by wearing their adult vest to meetings and events. My co-leader and I wore our vests to our first troop meeting and discussed the meaning of the vest with the girls. Whenever a girl doesn’t want to wear her vest, we remind her that we all wear our uniforms with pride because it unites us as Girl Scout sisters.
Insignia Application Service Available at Girl Scout Central
If you don’t have a Cricut EasyPress and live or work near mid-town Manhattan, check out Girl Scout Central. Girl Scout Central is located at 420 Fifth Avenue in New York City; entrance is located on 37th Street. They have a heat press and apply the insignia to uniforms for only $5; badges and patches for $1 each. Plan ahead if you’re having multiple uniforms done, because it takes time to properly place and apply the insignia to the uniforms. It’s worth the trip.
I hope you find this tutorial for applying badges and patches with a Cricut EasyPress helpful. Being a new troop leader can be overwhelming. Find a mentor and don’t be shy about asking questions. I’ll share more tips and projects as the troop year progresses.
For my fellow Cricut crafters, here’s a post with vinyl projects you may enjoy.
Join the Latina Mom in NYC Group for more crafts, deals and quick shares.
phfiery
December 6, 2025 at 11:13 pmIt’s fascinating how gaming evolves – from ancient Filipino traditions to today’s digital platforms! PHFiery seems to really embrace that history. Curious to try their unique games – anyone checked out the phfiery download apk yet? Seems promising!
championzone
February 12, 2026 at 2:15 pmBasic strategy’s all about minimizing losses, right? Seeing platforms like champion zone games offering quick PHP deposits via GCash is smart – less friction, more play! It’s good to see convenience prioritized.
openclaw social
March 6, 2026 at 12:40 amExcellent tutorial on applying badges! As someone who manages digital communities, I appreciate the attention to detail in temperature settings (320°F) and the dual-press technique. The distinction between earned badges and participation patches is a great framework for recognizing different types of achievements. The openclaw platform applies similar principles for community engagement.
kingphapk
March 6, 2026 at 6:01 amThe seamless mobile experience on King PH slot truly elevates Filipino gaming. Their 24/7 support and royal treatment make every session stress-free, whether you’re using the app or browsing via link.
tg7772
March 17, 2026 at 6:33 amJust found this gem during a break! The TG7772 app seems legit for Filipino players with GCash support. I’ll try the slots after my lecture; tg7772 app looks smooth on mobile, perfect for quick gaming sessions without wasting time.
2jl
April 11, 2026 at 3:06 pmGreat tutorial! The 320°F/30-second technique is spot-on—precision matters whether you’re crafting or enjoying digital entertainment. Modern tools like EasyPress and convenient 2jl app download apk both make life easier when you know the right settings. Thanks for sharing!
Catherine989
April 24, 2026 at 12:31 pmhttps://shorturl.fm/bJDMJ
win2max
May 3, 2026 at 3:51 pmSolid article! Thinking about bankroll management & quick payouts is key for tournament success. Seeing platforms like win2max offer fast withdrawals (3-8 mins!) & high RTP is a huge edge for consistent play. Definitely checking that out!