How to Make Goats Milk Soap
Homemade soaps are great stocking stuffers and everyday gifts. They are easy to make with a melt and pour soap base, and affordable. I originally made these goats milk soaps to give to Lucas and Sofia’s teachers as holiday gifts. It was an activity we could do together, which they were proud to give their teachers. Here’s a step-by-step tutorial for making melt and pour soaps.

You will need
- A microwave
- Pyrex measuring cup (4 cup)
- Spatula
- Measuring spoons
- Cutting board
- Knife or scraper
- Silicon or plastic soap molds
- 2 lb goats milk soap base
- Spray bottle with rubbing alcohol
- Honey (optional)
- Essential oils or fragrances (optional)
- Exfoliants – ground coffee, oatmeal (optional)
- Colorants (optional)
- Wrapping supplies – cellophane bags and ribbon or shrink wrap

Step 1: Cut the Soap into 1″ pieces
The soap base is sold in 2 lb blocks. Remove from the package and divide into two 1lb pieces. The melt and pour goats milk soap base I used has score lines build into the mold so it’s easy to cut and measure. Place the soap block on your cutting board and cut into 1″ pieces using a knife or scraper.
For this project, I chose goats milk, because it moisturizes and soothes dry and damaged skin. There are a lot of soap base options available online and at your local craft store, including shea butter, avocado, and olive oil.
Step 2: Melt the Soap
Place the soap in your Pyrex measuring cup and microwave according to the package instructions. For my soap base, I microwaved for 30 seconds on high and then 10-second intervals until all the soap was melted. As you melt the soap, stir it to remove any small clumps and scrape the sides of the measuring cup.
Step 3: Customize your Soap
This is the fun part! For my first batch, I added honey (2 tablespoons) and lemon essential oil (2 teaspoons) to 1 lb of soap base.
For my second batch, I added ground coffee (1 teaspoon) and lavender essential oil (2 teaspoons) to 1 lb of soap base.
The essential oils are 100% pure, plant based, and gluten and paraben free. They are a natural alternative if you want to add scent to your soaps. Aromatherapists attribute cleansing properties to lemon and rejuvenating properties to lavender. Honey helps keep skin hydrated and prevents drying. Ground coffee is a gentle exfoliant.
Tip: You don’t want the melted soap to crust over so work quickly as you add to the base. If it does crust over, heat in the microwave before you pour the soap mixture into your mold.


Step 4: Pour Soap into Molds
Prep your soap molds by spraying with alcohol. The alcohol will prevent bubbles. Carefully pour your soap mixture into your molds. Once in the mold, spray the top of the soap mixture with alcohol to remove any bubbles which may have formed as you poured. Let the soap cool for at least 40 minutes (refer to package instructions). When you’re ready to remove the soap from the molds, place in the freezer for 10 minutes. It’ll make the soap firm and easier to remove from the mold.
I prefer silicon over plastic molds, because it’s easier to pop the soap out of the mold. There are lots of silicon mold options available online and at your local craft store. You can play with the different sizes and shapes based on the occasion or theme.
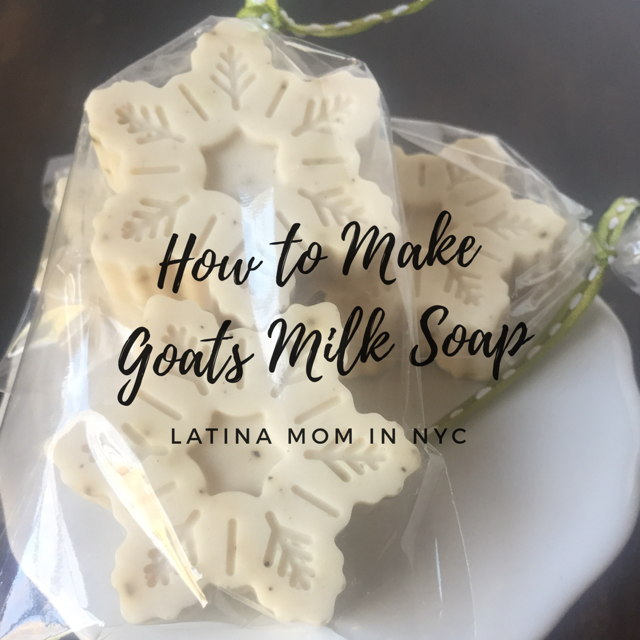
The 1 oz snowflake-shaped soaps are a great size for guest soaps. I wrap these smaller soaps in sets of 4. The 3 oz flower-shaped soaps are a good size for bathing. I wrap these individually or in sets of 2 when I’m gifting them.
Step 5: Wrap your Soaps
Soap can sweat, so you want to wrap it in shrink wrap or place in favor bags until you use them. In the images above, I used favor bags and tied them with ribbon. In the image below, I used shrink wrap. Try each method and decide which you prefer.


I found these gift boxes at my local Dollar Tree. They are the perfect size for these soaps. I used shredded paper to keep the soaps from moving around in the boxes. Click here for more wrapping ideas.
Tutorials and YouTube Videos You’ll Find Helpful
- Soap Queen Tutorials
- Kin Community: How to Make Soap at Home
- Divas Can Cook: Milk & Honey Soap Video
Soap making is a fun craft if you want to learn something new. You should also try making sugar scrub. The ingredients are similar, and you can pair them up to make a great winter skin care gift set. Get creative with your scent and soap combinations, and wrapping.
Happy Crafting!
Jackie
Join the Latina Mom in NYC Group for more crafts, deals and quick shares.
10 Valentine's Day Gift Ideas for Sisters & Best Friends | Latina Mom in NYC
January 17, 2018 at 7:36 pm[…] these Valentine’s Day gifts for my sister and nieces. I paired my Target finds with handmade goats milk soaps in different sizes to make girlie gift […]
Valentine's Day Gifts for Teachers - Latina Mom in NYC
November 25, 2018 at 5:09 am[…] Goats Milk Soap […]
Gifts for Coworkers - Latina Mom in NYC
December 13, 2018 at 5:19 am[…] by reading my tutorial for making goats milk soap. My latest batch of soap is gardenia-scented and exfoliating due to the addition of coffee. […]
Easy Sugar Scrub Recipe - Latina Mom in NYC
January 2, 2020 at 4:34 am[…] prefer to use essential oils for homemade scrubs and soaps. They are a natural alternative, which are 100% pure, plant based, and gluten and paraben free. I […]