How to Make Chocolate Wedding Favors
Our friends, Yvette and Miguel, are getting married this weekend. As their gift, I made chocolate wedding favors. I like candy favors because they are a treat your guests can enjoy when they get home and can be coordinated with your wedding colors and theme. Chocolate favors can be made in three ways:
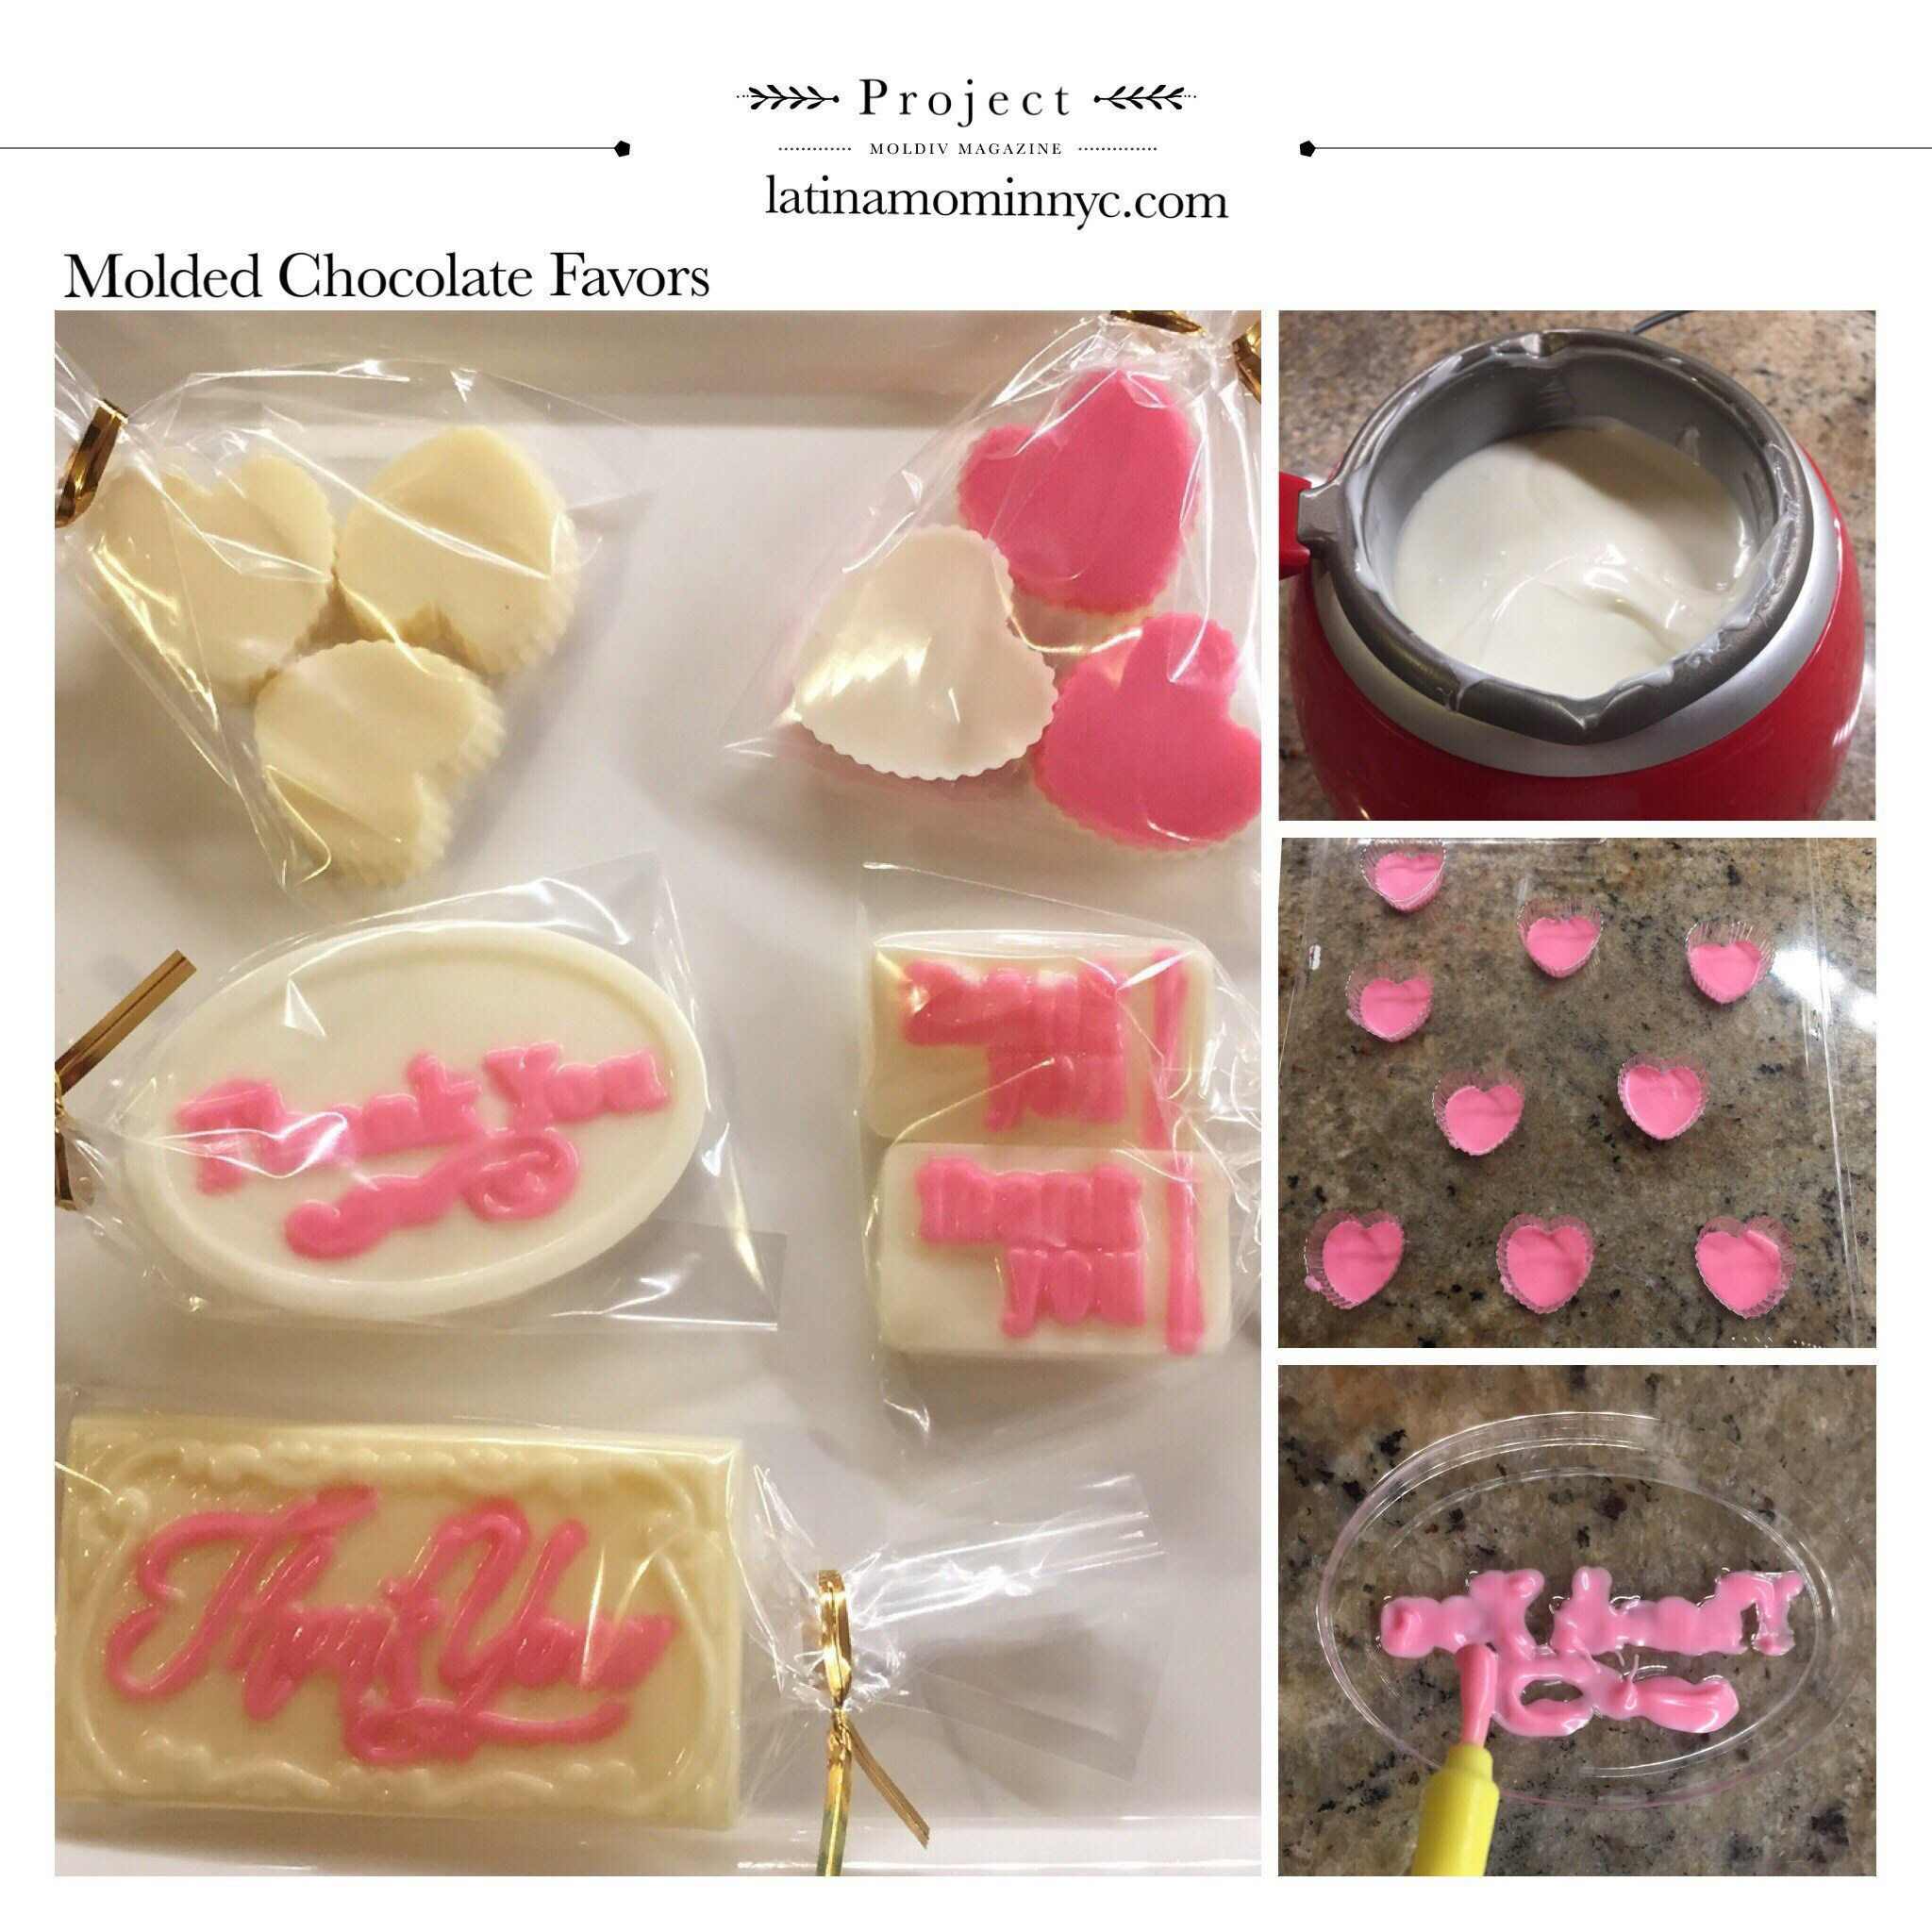
- a single color, like the white candy hearts on the top left
- 2 colors layered on top of each other, like the white and pink hearts on the top right
- a solid base with colored accents, like the thank you bars
If you’re making a lot of favors (I made 30), I suggest you save time by sticking with 1-2 colors because you will need to melt each color and let them set in the mold between colors/layers. You should also mix and match your designs so you can make multiple molds at one time. For this project, I used 4 molds.
Melting the candy wafers:
- Melt candy wafers based on package instructions. I prefer to use the candy melting machine which is inexpensive and available at most craft stores. If you use the melting machine, melt a handful of wafers at a time on high to get a smooth shiny consistency (see image above). Once the desired amount of wafers is melted, change the setting to warm.
- To fill the mold cavities, I like to use a small cookie scoop or spoon.
- As you fill each cavity, tap the mold on your table to remove any air bubbles and make the top smooth. Make sure your molds and utensils are dry; any water drops will form bubbles and discoloration in your candies.
- Place the mold in the fridge and allow the chocolate to set.
- Once it sets, carefully remove the candy from the mold and place in a treat bag or air tight container until you’re ready to use.
Tips for making the 2 color favors:
To make the 2 color favors, you’ll need a food decorating brush. The bristles on the decorating brush are different from paint brushes making them easy to clean and reuse. To melt the candy for the accents, I use Wilton ceramic cups in the microwave.
- Place the wafers in the ceramic cup, microwave for 30 second intervals and stirring until smooth. You may need to microwave more than once depending on the size of the cup and amount of wafers being melted.
- Dip the brush in the candy and tap it into the area you want to “color” – see image above. If the candy starts to cool as you work on the mold, microwave it as needed.
- Tap the mold on the table and place it in the fridge to set before you add the second layer/color. If you don’t allow the first color to set, the colors will melt into each other.
Remember, when something is handmade, the perfection is in the imperfection. Don’t stress if you color a little outside the lines. Your friends and family will appreciate the effort you put into it. It gets easier with practice.
You can display your favors by placing them on a cake stand or tray, like the image above. You can also place them in favor boxes. These candies will be placed in a small white box. I’ll update the post when I’m done personalizing the favors.
Be creative and have fun. Let me know if you have any questions and share your pictures if you try this project for your next party.
How to Make a Custom Stenciled Wedding Album | Latina Mom in NYC
September 25, 2017 at 8:01 pm[…] weekend, I had the pleasure of attending Yvette and Miguel’s wedding. In addition to wedding favors, I made them a custom stenciled wedding album with their names and wedding date. While we live in […]